How To Make Smart Plant Watering System With ESP8266 NodeMCU New Circuit Diagram Relay Module: Controls the water pump based on sensor data. Water Pump: Supplies water to plants. Tubing and Drip Emitters: Delivers water to each plant. Water Reservoir: Stores water for the system. Power Supply: Powers the pump and ESP32. Blynk App (or similar): Mobile app for monitoring plant health and receiving alerts. Overwatering or underwatering can lead to stress, disease, or even plant death. Soil sensors help maintain optimal moisture levels, leading to healthier root systems and improved plant growth. 3. Cost Efficiency. Automating your watering system with soil sensors can lead to substantial cost savings in the long run.
Many smart systems also include sensors that react to rainfall, ensuring that your plants get just the right amount of water. 3. Consistent Watering Schedule. Plants thrive on consistency. An automated system allows you to establish a regular watering schedule that ensures your plants receive water at the same time every day. Working of smart plant watering system: We are connecting a single MCU (Arduino, Node MCU, Wemos D1, ESP 32) to a Soil moisture sensor here we are using a capacitive sensor instead of resistance sensor because those sensors has DC current wiith two metallic electrodes printed on the silicon board which cause the electrolysis and the metals corrode by damaging the device permanently. This process requires careful calibration to avoid over- or under-watering the plants. In this project, you will build your own automatic irrigation system for an indoor plant, like the one in Figure 2. This way, you do not need to worry about waterproofing your circuit for outdoor use, although that is an optional variation of the project.

Automatic Plant Watering System with Arduino & Soil Sensor Circuit Diagram
Smart Plant Watering Project. Now let's build an automatic plant watering system that detects soil dryness and activates a pump to water the plant. Components required: Arduino UNO; Soil Moisture Sensor; 2 CH-Relay module; Water pump (5V or 12V) Jumper wires; Power supply/Battery; Tubing for Water Flow; Circuit diagram

In this project, we will build an automatic plant watering system using a soil moisture sensor and Arduino. The soil moisture sensor will be used to measure the moisture level in the soil and the Arduino will be used to control the watering system. Required material. Arduino Nano* 1; Soil Moisture sensor * 1; 5v relay module * 1

Build a Circuit to Automatically Water Your Plants Circuit Diagram
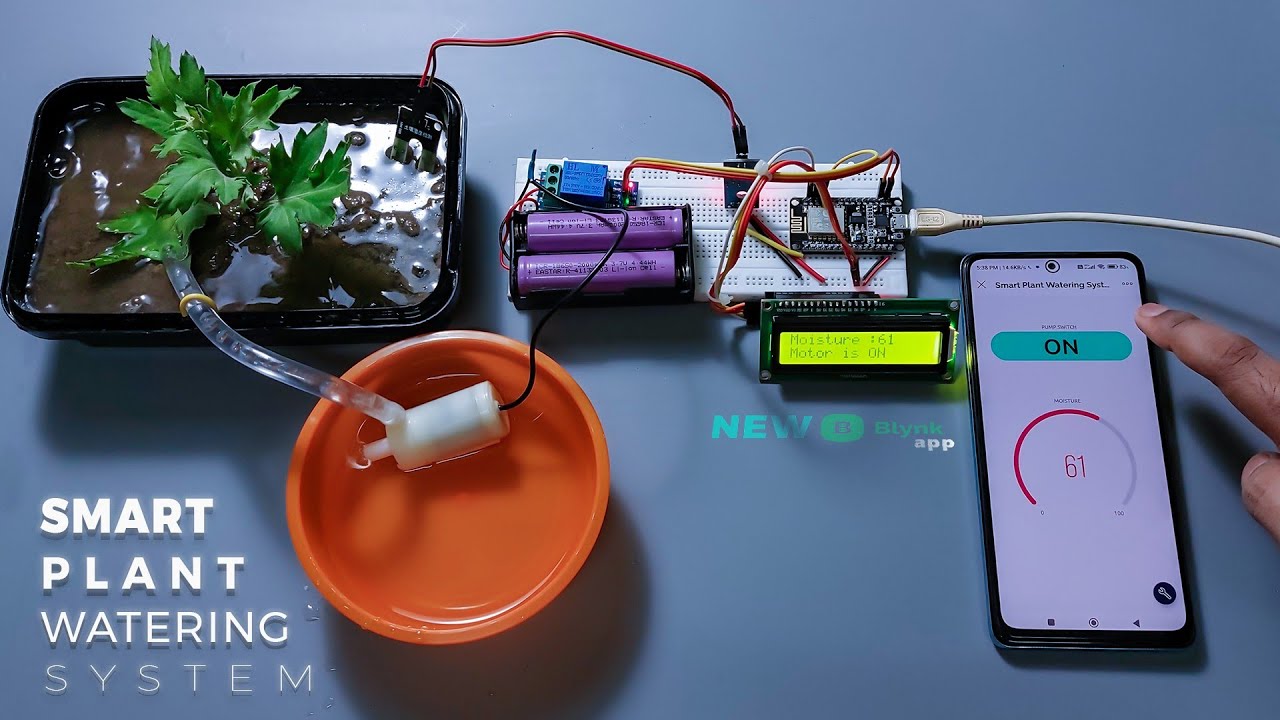
Building an automatic plant watering system is becoming increasingly popular among gardening enthusiasts and IoT hobbyists. This DIY automatic plant watering system project helps solve the common problem of forgetting to water plants while away from home. In this complete guide, we'll show you how to make an automatic plant watering system with soil moisture sensing and mobile app control Conclusion: In conclusion, the Automatic Plant Watering System harnesses the power of the Arduino and the precision of a Capacitive Soil Moisture Sensor to ensure optimal watering for plants. No longer will plants face the risks of being under or over-watered.With real-time moisture level data displayed on an OLED screen, users are kept informed not only about the soil's condition but also
