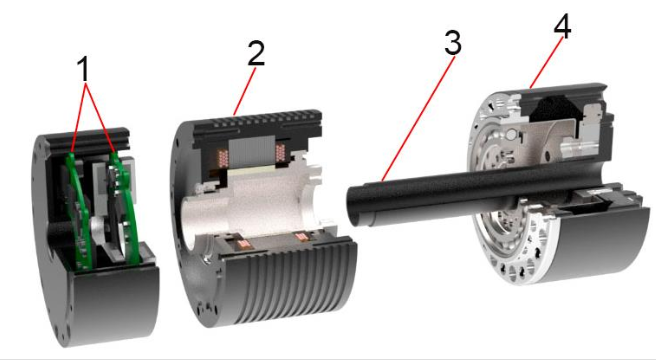
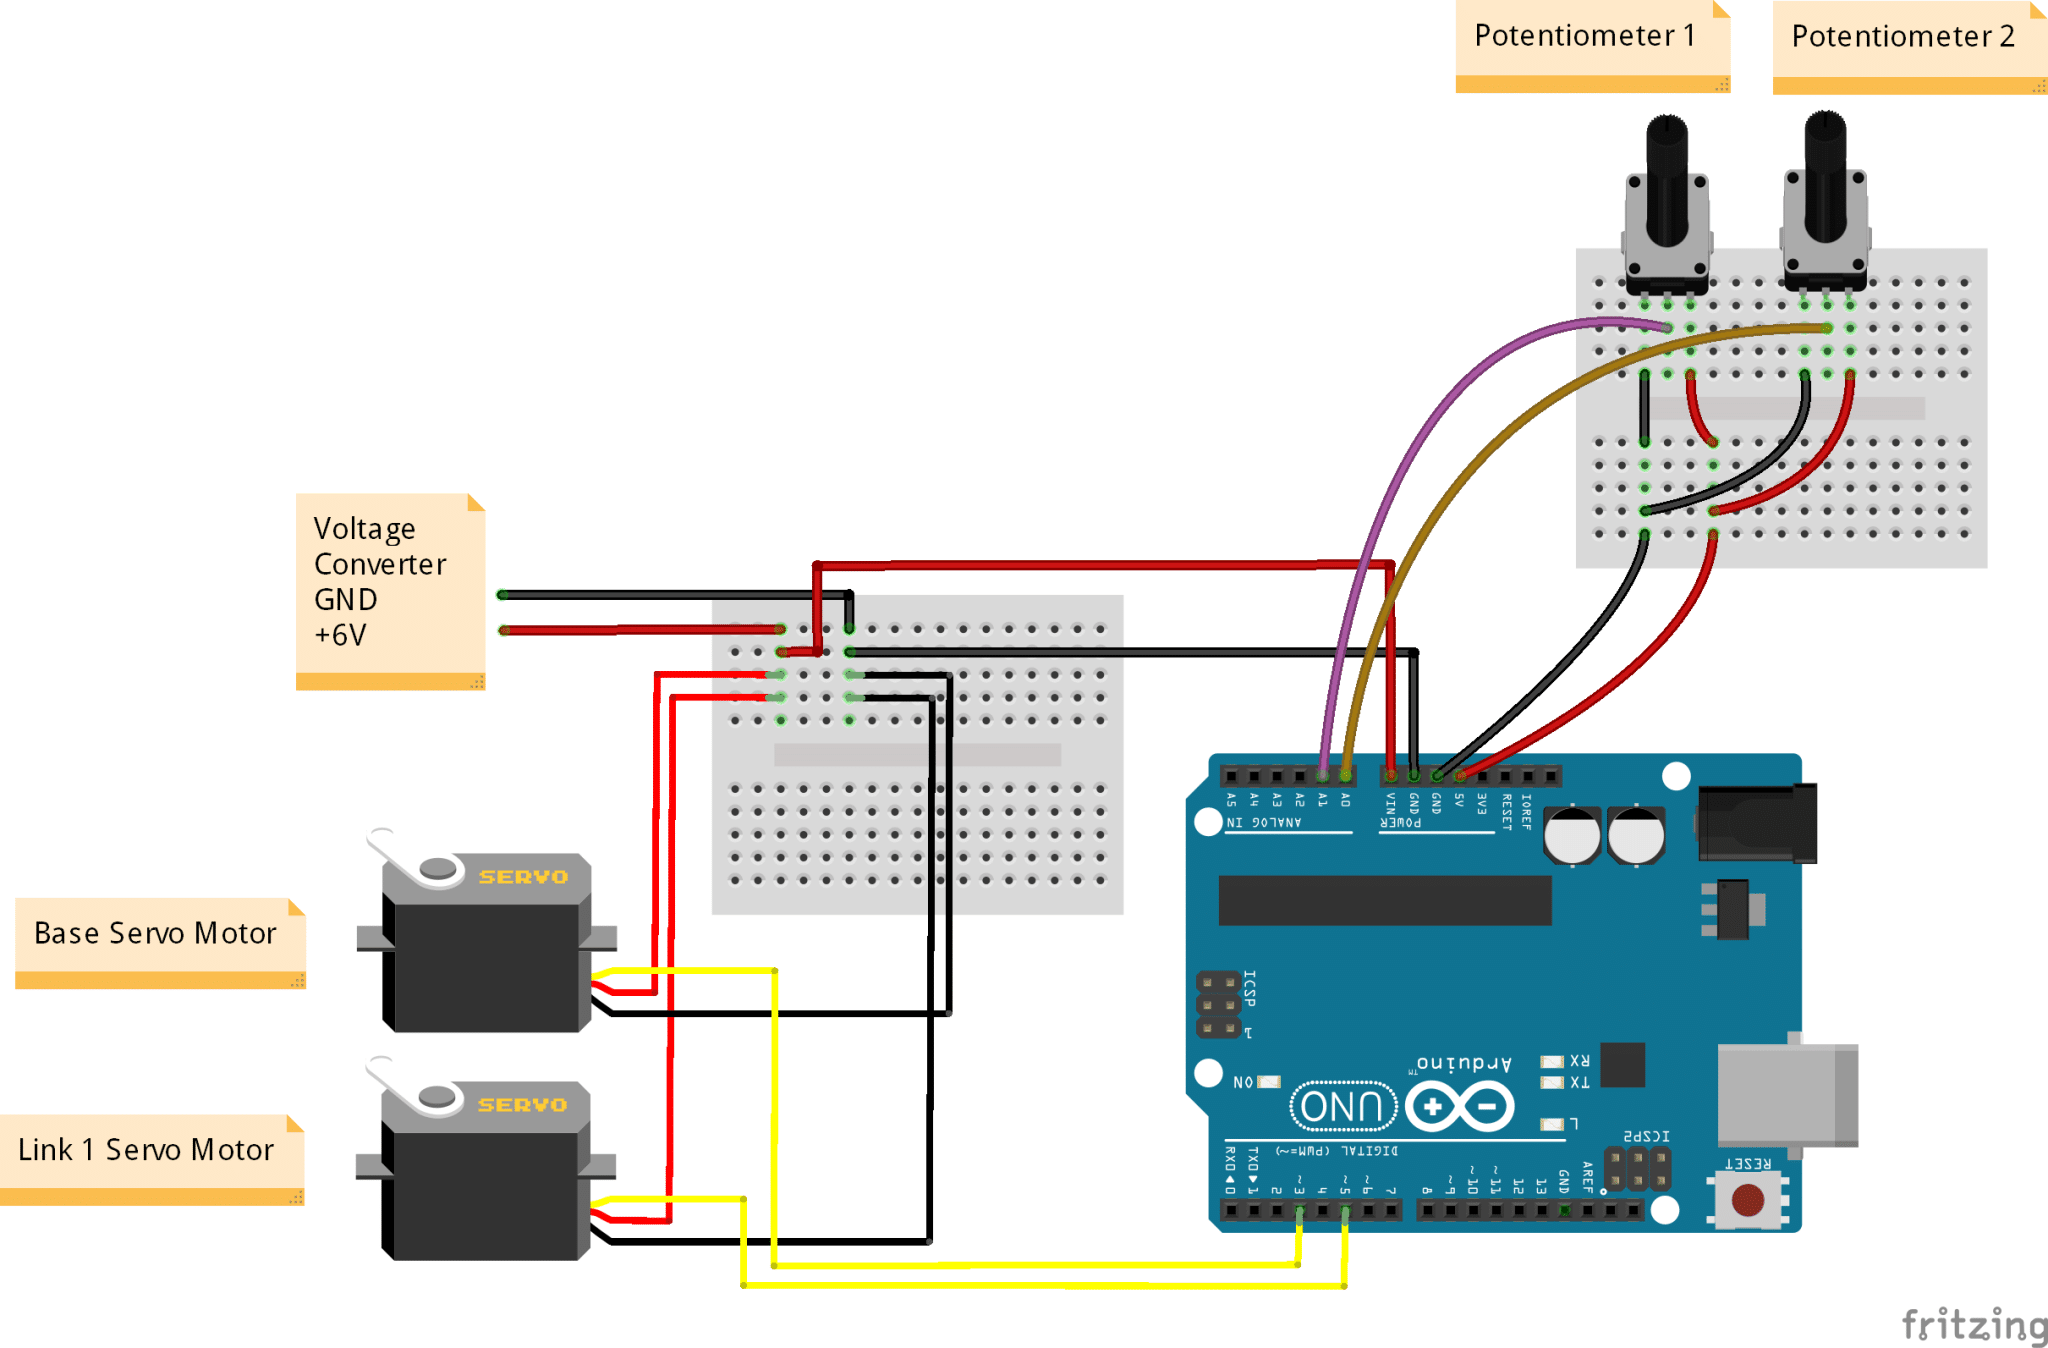
Micro servo Circuit Diagram 1) Servo motor assembly: - Servo motor as J1, J2, J3, J4 fix the servo motors as shown in image use 3M tape to glue servo, use thin flexible plastic strip to make griper, make hole in center of each finger tie thread in that hole pass this thread from center hole and tie knot at the other end of thread with 4th servo motor's knob, as you Building your own Robotic arm step by step guide. Fun Electronic project using Arduino and servo motors. Broaden your knowledge in Arduino and basic Coding. The Servo Motor 9G is a compact and lightweight actuator capable of precise rotational positioning. It is widely used in robotics, remote-controlled vehicles, and various DIY electronics projects. The servo is designed to operate on a 5V power supply and can be easily interfaced with microcontrollers such as the Arduino UNO for accurate angle control.

Controlling Servo Motor (Sg90) With Raspberry Pi 4: This tutorial gives an introduction to robotics , it involves controlling servo motor with raspberry pi 4 microcontroller. APPLICATIONS Further applications of servo motor can be used to create complex system like Robotic Arms (Industrial Robots)…

The Beginners Guide to Micro Servos Circuit Diagram
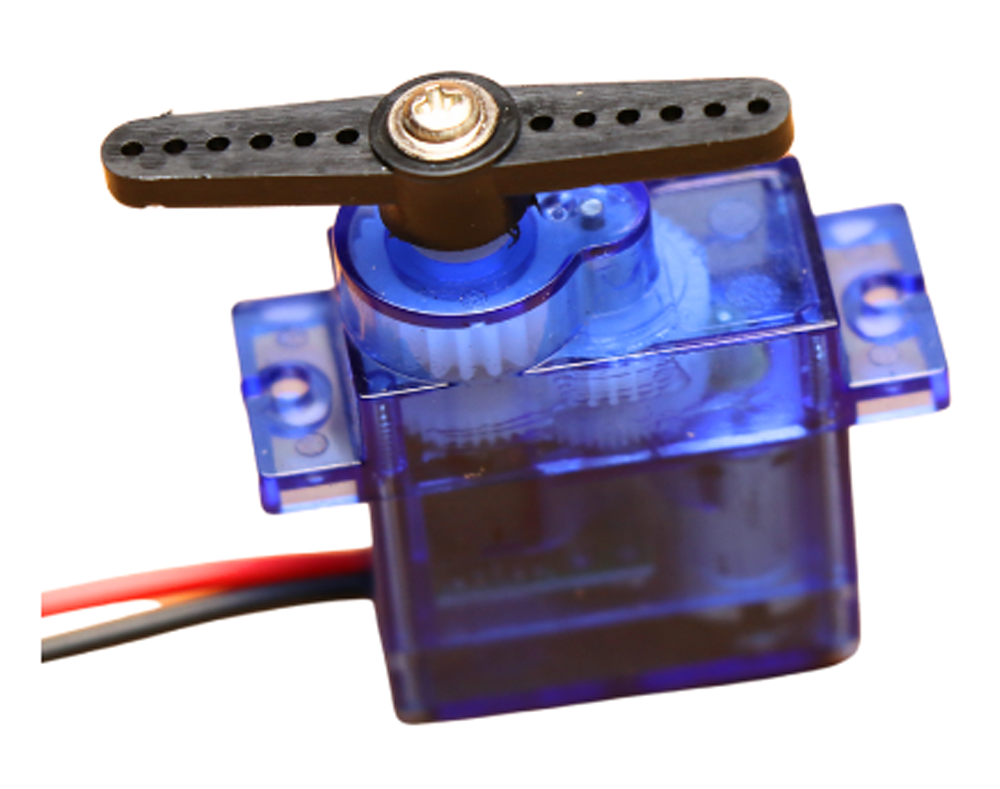
This project is a beginners tutorial on how to use servos. All you need is an arduino uno and a micro servo (I recommend tower pro 9g micro servos). I have put together four cool projects for beginners. The first project is a servo tester. The servo tester moves the servo to zero degrees, waits 10 seconds, then moves to 90 degrees, waits 10 seconds, then moves to 180 degrees, and waits 10
Learn about servo motors, their types, working principles, and how to control them in robotics and electronics projects. In this tutorial you will learn how servo motors work and how to control them with Arduino. Wiring diagram and many example codes included!
Controlling Servo Motor (Sg90) With Raspberry Pi 4 Circuit Diagram
Learn easily how to make your own Robotic Arm With Servo Motor Using Arduino by just following the steps as discussed here.