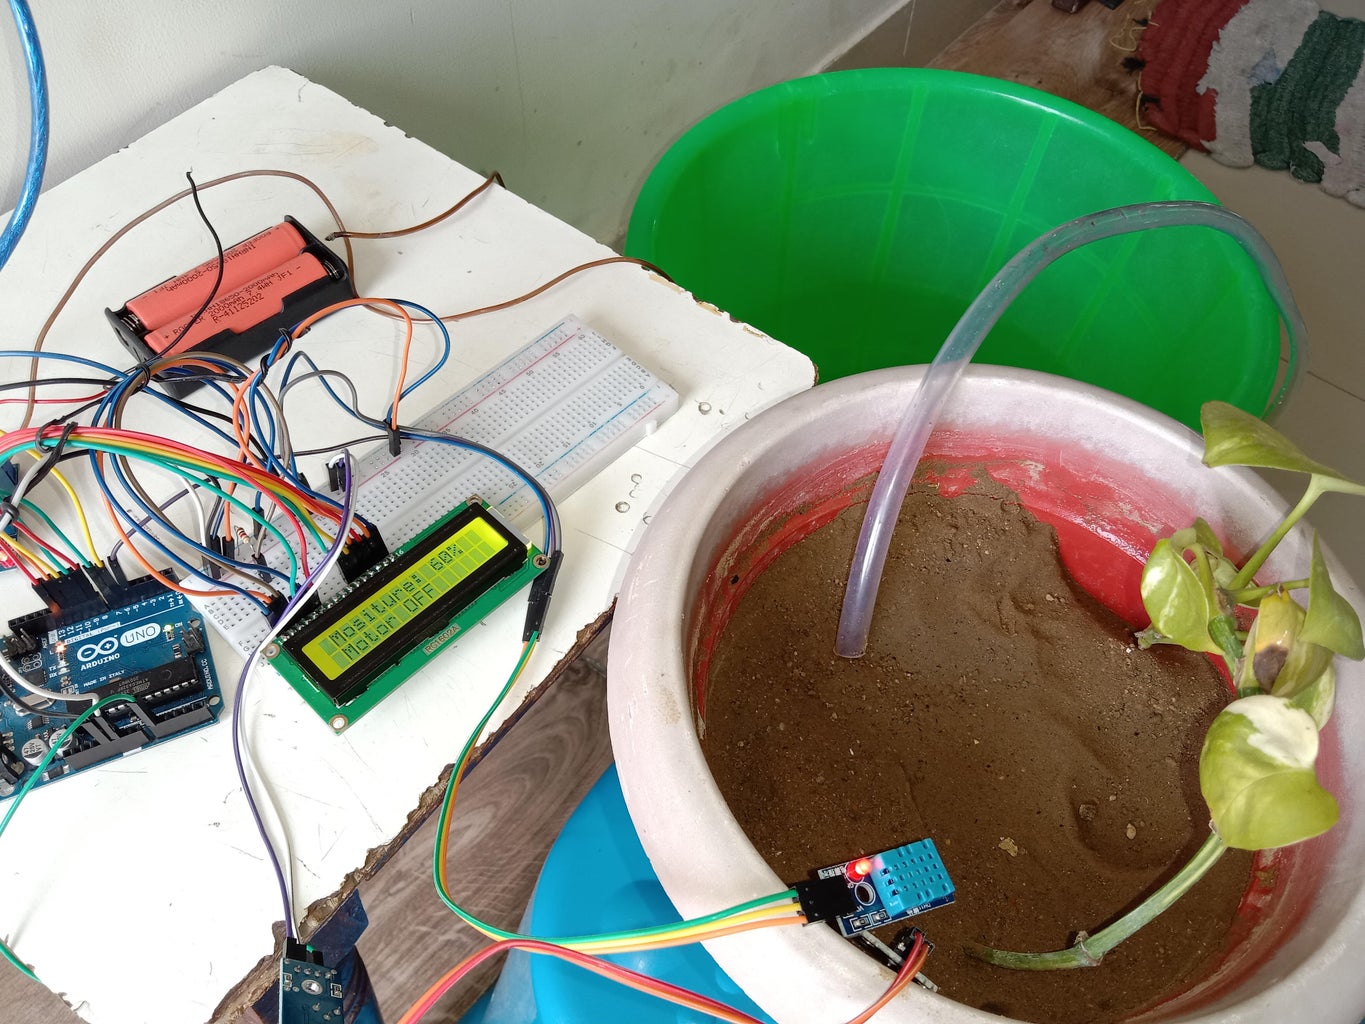
Smart Irrigation System Using Arduino Uno Soil Moisture Sensor and Circuit Diagram Learn how to make automatic irrigation system for garden. How to make automatic water system for plants. When soil moisture is dry, turn pump on, When soil moisture is wet, turn pump off. The detail instruction, code, wiring diagram, video tutorial, line-by-line code explanation are provided to help you quickly get started with ESP32 Learn how to make automatic irrigation system for garden. How to make automatic water system for plants. When soil moisture is dry, turn pump on, When soil moisture is wet, turn pump off. The detail instruction, code, wiring diagram, video tutorial, line-by-line code explanation are provided to help you quickly get started with Arduino. Find this and other Arduino tutorials on The process of this irrigation system. Insert the soil moisture sensor probe into the soil while the system is operating. The moisture content will then be displayed on the LCD as Low, Medium, or High. The relay module will automatically activate when the moisture level is LOW and deactivate when it is MEDIUM or HIGH.
Sensors: You will need various sensors to monitor your garden's environment, such as temperature, humidity, light, and soil moisture sensors. 3. Irrigation system: An automated irrigation setup, including pumps, tubing, and valves, will ensure your plants receive the right amount of water and nutrients. 4. This System will help you to irrigate your backyard Garden or your Indoor Garden automatically and you need not to worry about watering your favorite plants in your busy schedule. Arduino UNO is the brain of this system and all the sensors and display devices are controlled by it. A Moisture sensor is used to read the Moisture content of the soil.

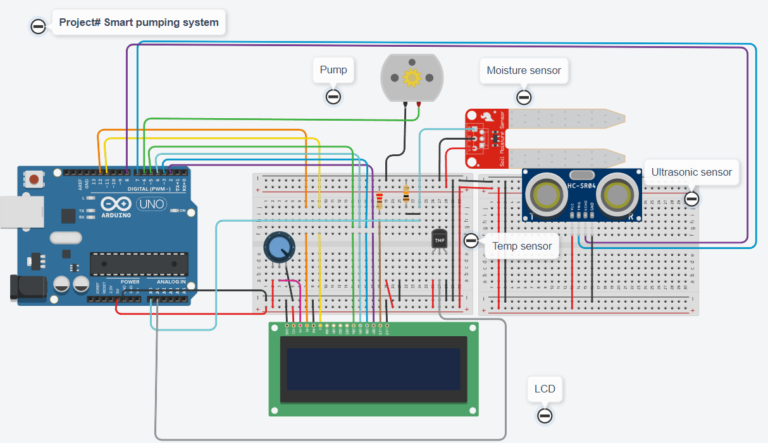
How to make an automatic irrigation and plant watering system using ... Circuit Diagram
Working of the Automatic Irrigation System. The logic of this system is very simple. In this system, the moisture sensor senses the moisture level of the soil and when the sensor senses a low moisture level it automatically switches the water pump with the help of a microcontroller and irrigates the plant. Automatic Irrigation System : In this project, I will be showing you how to create an automated watering system. you can use the general principle for pretty much everything and everywhere. The system uses an Arduino and sensors to water your plants at the correct time. Power on: The system is powered by a 12V power supply connected to the Arduino board. The power supply is regulated using a voltage regulator to provide stable 9V DC power to the Arduino Nano. Sensor reading: The system uses a capacitive soil moisture sensor connected to an analog input pin of the Arduino.
The Smart irrigation System has wide scope to automate the complete irrigation system. Here we are building a IoT based Irrigation System using ESP8266 NodeMCU Module and DHT11 Sensor. It will not only automatically irrigate the water based on the moisture level in the soil but also send the Data to ThingSpeak Server to keep track of the land 1 -n Capacitive Soil Mositure Sensor; 1 -n Pump; Aquarium tube and irrigation nozzles; The "n" in the amount is due to the number of pumps or different plants. For example, in a raised bed it is usually sufficient to have one pump and one sensor.
.webp)